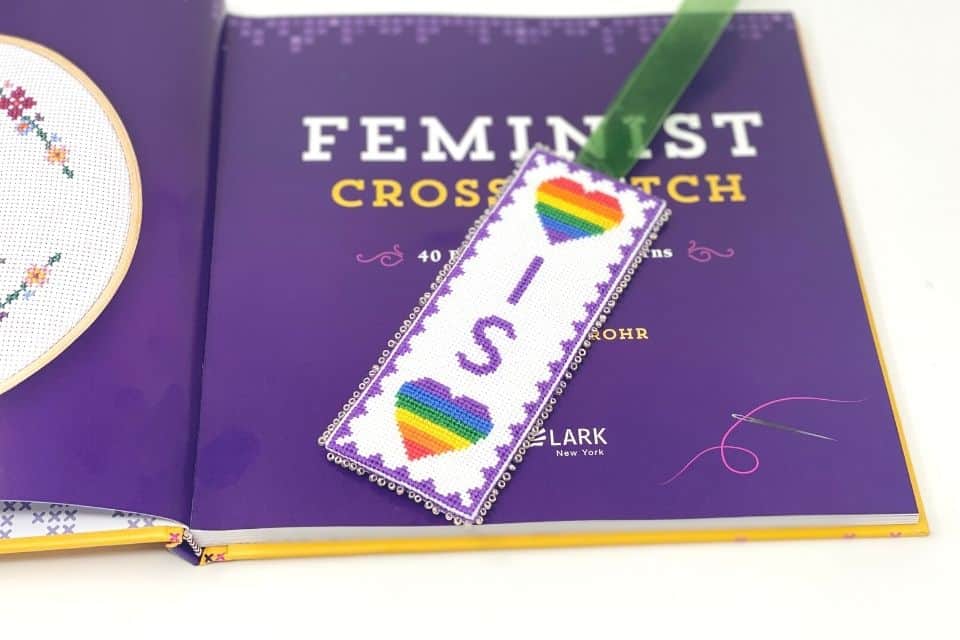
(When the author of the Feminist Cross Stitch Book, Stephanie Rohr, posted about how Michael’s Crafts took her book off the shelves, I just HAD to get one! 😄 You can still find it on Amazon.)
Cross stitch bookmarks make thoughtful, creative gifts for book lovers and are easy to make.
The problem with using fabric glue or starch for a project like this is that it’s hard to avoid using too much. Then the glue soaks through to the front of the fabric where it dries forever and ruins the project. Or the starch changes the color, giving it a strange white haze.
Two things I really like about making a cross stitch bookmark this way are:
- All the edges of the fabric are tucked in without using glue
- The bookmark isn’t all floppy without using fabric starch
In this tutorial, I’ll show you how to add a ribbon and beads if you like. Because sparkly stuff makes everything better!
Watch the Cross Stitch Bookmark Tutorial Video
Tools and Materials
VIEW MY AMAZON SHOPPING LIST OF TOOLS AND MATERIALS NEEDED TO COMPLETE THIS PROJECT
Tools
- Embroidery Scissors – used to complete the cross stitch pattern, and can also be used to cut the fabric
- Tapestry Needle – for the cross stitch
- Embroidery Needle (Optional to Add Ribbon)
- Beading Needle (Optional to Add Beads)
- Iron
- Ironing Board
Materials
- Fabric – you will need twice the amount needed for the pattern, plus borders
- Cross Stitch Pattern
- Embroidery Floss
- Ribbon (Optional)
- Seed Beads (Optional)
What kind of cross stitch patterns are good for a bookmark?
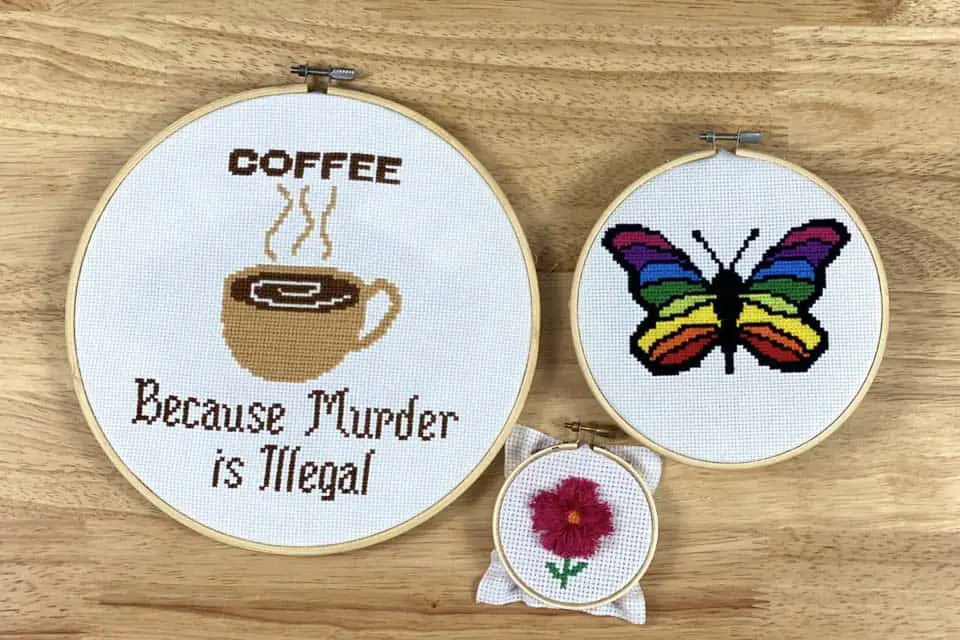
For a bookmark, choose a cross stitch pattern that is longer than it is wide. It should be portrait in orientation, and relatively small. Some ideas are:
- Flowers
- Video Games
- Funny Phrases
- Geometric Shapes and Patterns
- Lovable Book Characters
- Animals

Cross Stitch Bookmark Finishing Ideas
Finishing the edge of the bookmark can be more than just a simple whip stitch.
- Embellish with beads
- Add Pom Poms
- Connect the edges together using a zig-zag pattern
- Add some beads to the end of the string or ribbon
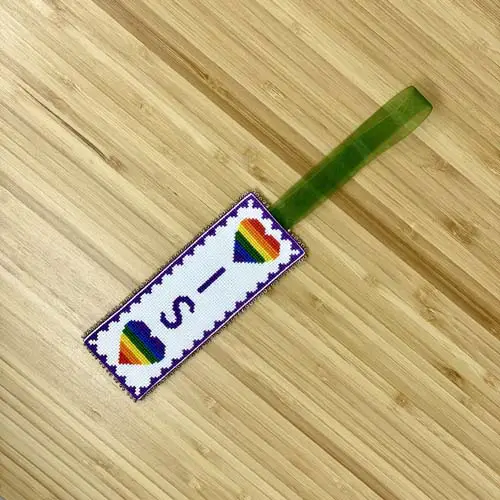
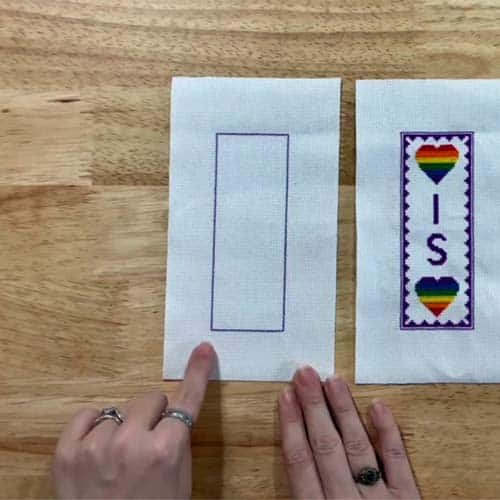
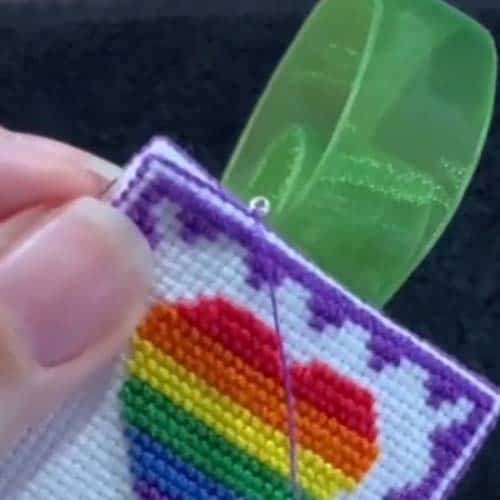
For this tutorial, I used this “Love is Love” pattern and embellished with a ribbon and beads.
Enjoying This Tutorial?
Become a VIP and get instant access to free patterns, plus future tutorials and stitchy inspiration delivered to your inbox.
Cross Stitch Bookmark Instructions
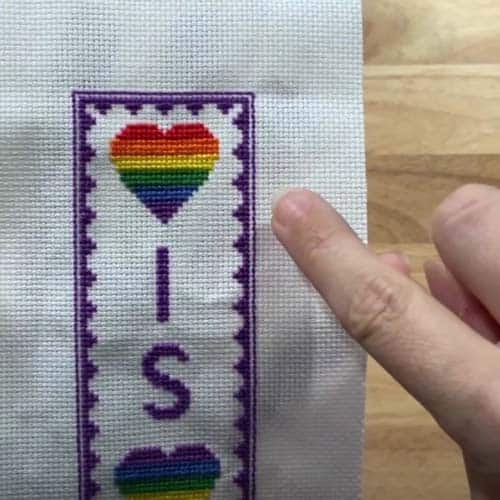
1. Stitch Up the Pattern
The first step is to stitch the cross stitch pattern.
2. Back Stitch a Border
On the outside of your pattern, add a back stitch border all the way around the entire pattern. This will determine how big your bookmark will be.
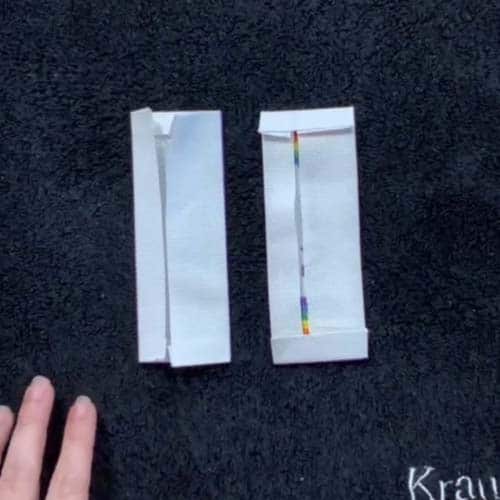
3. Back Stitch Another, Identical Border
On a second piece of fabric, back stitch a border that is the same size as the first piece. This will be the back side of your bookmark. It’s important that the two borders are identical in size so that they fit together later.
4. Fold the Fabric Along the Borders
Fold the fabric on the long side from front to back along the line that you created with the back stitch.
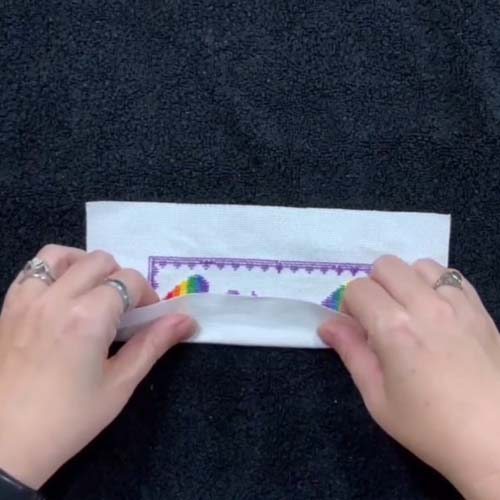
Fold the opposite side of the fabric and check and see if the two side overlap.
5. Trim the Excess Fabric
If the two sides do overlap in the back, trim them. Left untrimmed, the bookmark will become too think to place in a book.
Repeat folding and trimming along all 4 sides of the bookmark.
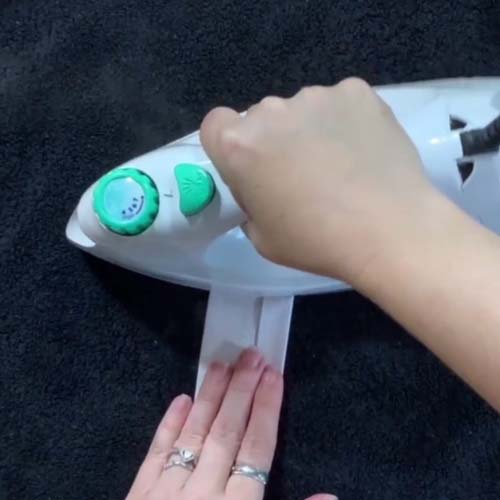
6. Iron the Four Sides of the Bookmark Folded in Place
Set your iron to the correct setting for the fabric you’re using, and iron the 4 sides of the bookmark.
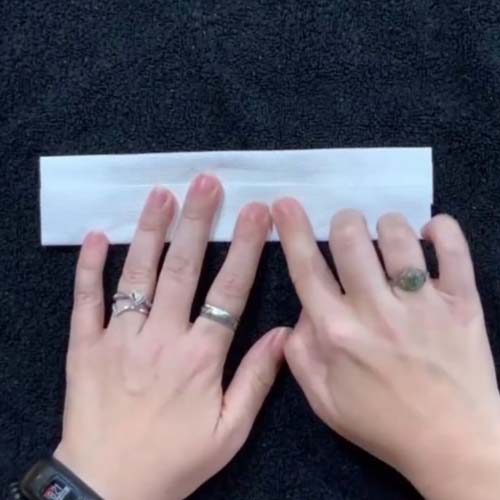
7. Repeat Folding, Trimming and Ironing
On the second piece of fabric with only the back stitch, repeat the steps for folding, trimming and ironing. You will want to iron the top and the bottom first before ironing the two long sides.
8. Add Ribbon to Your Cross Stitch Bookmark (Optional)
Cut a piece of ribbon to approximately 10 inches.
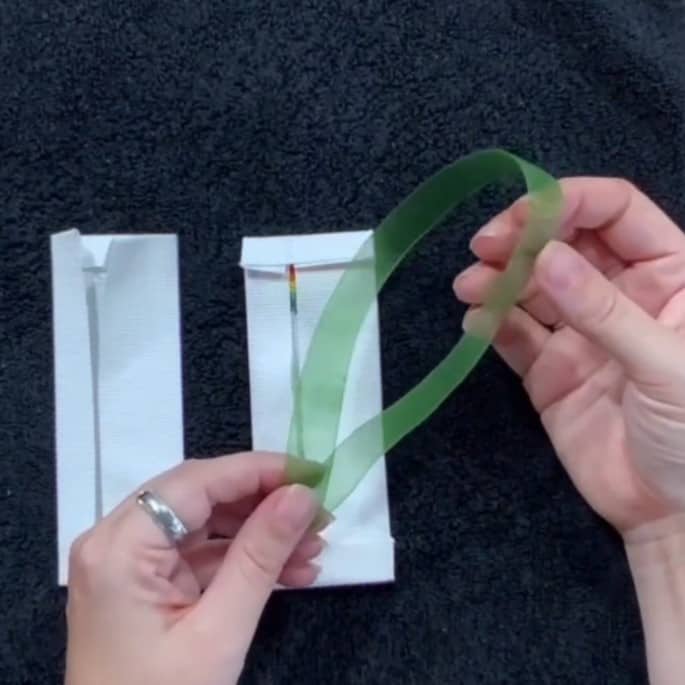
Fold the ribbon in half and place it in between the front and back pieces of your bookmark. That way the ends of the ribbon are tucked inside the bookmark and won’t fray.
You can choose to have the ribbon come from the top or the bottom of your bookmark. I chose the top.
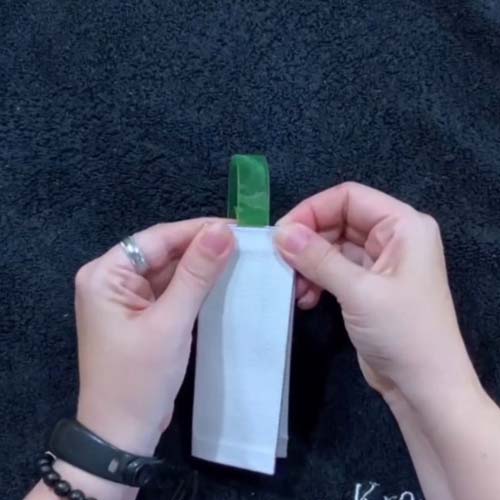
Using an embroidery needle, whip stitch between the two sets of back stitch to attach the front and the back of the bookmark together. Make sure that the front and back sides are aligned.
Anchor the tails of the thread on the inside of the bookmark.
Start at the ribbon (in my example, that is the top), and stitch through the ribbon.
The needle goes through a back stitch, through the ribbon, then through the corresponding back stitch on the other size.
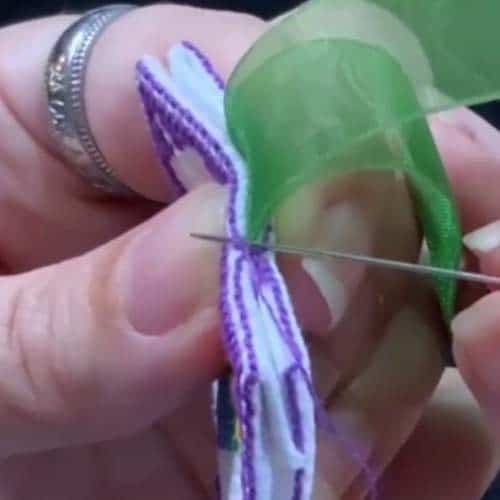
On the way back to start another whip stitch, push the needle through only the ribbon.
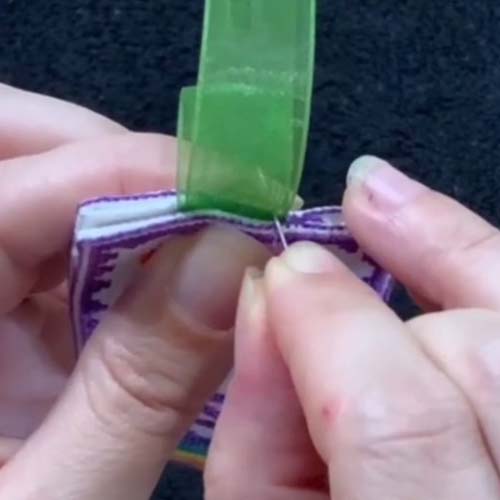
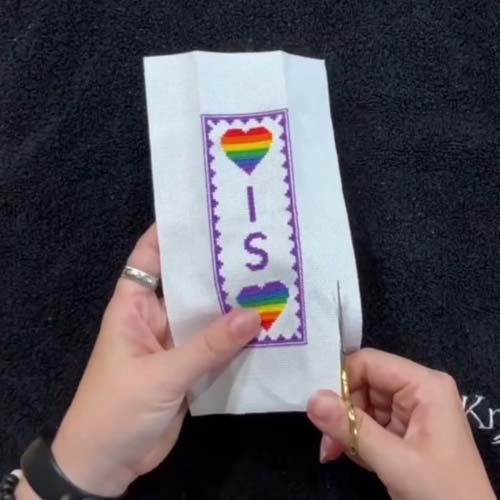
9. Finish Attaching the Front and Back Bookmark
After you get through the ribbon, you can remove the embroidery needle and thread a tapestry needle to finish the whip stitch and attach the front and back pieces of the book mark all the way around the 4 sides.
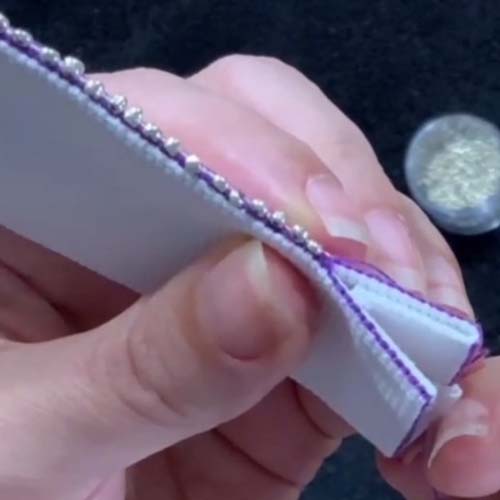
10. Adding Seed Beads (Optional)
If you choose to add beads such as in the example, put away your embroidery needle and thread the beading needle.
Continue using the whip stitch through the back stitches to attach the front and back pieces of the bookmark. At every other back stitch / whip stitch, add a seed bead.
The Completed Bookmark!