This page contains affiliate links. Visit here or here to learn more.
Eight Easy Ways to Start a Thread (with Pictures)
I’m going to show you 8 quick and easy ways to securely start a thread for handmade embroidery. You can choose which best suits you, and change it for every project you do. You can even change it up for each thread you start.
One of the great things about hand embroidery is that there are no rules. You can create your art in any way you want! But, there are those tried-and-true practices that stitchers have developed over the centuries. Why why reinvent the wheel?
For a super quick tutorial, watch this video.
The Loop Start
This is the method I use the most to secure a thread for embroidery. It’s quick, neat and easy. The primary limitation to loop method is that it only works with an even number of threads. It’s so easy to work with, that I would rather change my project to 2 or 4 threads than use a different starting method.
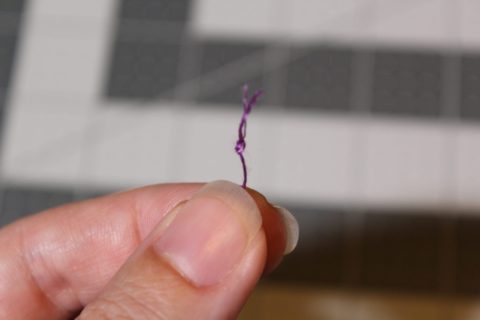
Using the Loop Method means that when you cut the embroidery floss, you leave it twice as long. For two threads, pull out one thread to fold in half. For four threads, pull out two, and so on.
1. Loop in the Back
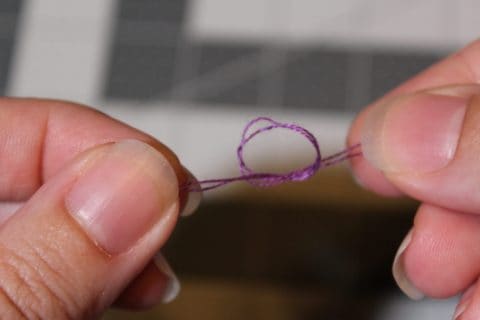
Fold the floss threads in half before you thread the needle. Pass the needle from the back to the front, leaving a little bit of thread loose in the back, forming a loop. Then, create the first stitch, pushing the threaded needle from the front to the back. Pass the needle through the loop, and gently tighten the stitch to your desired tension.
2. Loop in the Front
For the Loop Method in the Front, start the same as the back with thread that is twice as long, fold the thread in half, then thread the needle.
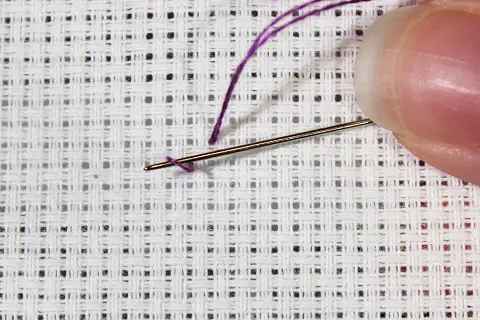
Pass the needle from the front to the back, form the first stitch, then push the needle from the back to the front. Pass the needle through the loop, but don’t tighten it all the way just yet.
Go back through the fabric using the same hole that you started with. This time, make sure that the needle is on the OUTSIDE of the looped thread. This little trick will push the looped part of the thread to the back, where it will not be seen from the front of your project.
Needle goes back through the same hole, OUTSIDE the loop.
Securing a thread with the Loop Method in the front is just as neat, tidy and easy as from the back. It also allows you to start a thread for embroidery without even having to look at the back of the fabric at all.
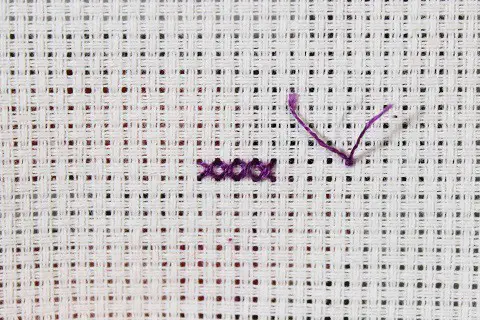
In one stitch, the thread is perfectly secure.
How the Loop Method Looks from the Back
3. Let it Hang Loose
You read that right! Just let the tail end of the thread hang out in the back (or even in the front if you’re feeling frisky) until you’ve stitched over it. This works ok in a hurry for projects that are made to hang on a wall.
Remember to trim the tail once youve stitched over it a few times. Otherwise, your next stitches might pull it through to the front of your project.
Not recommended for projects that need to stand the test of time. Rarely, the tail can work its way loose.
4. Tie a Knot
Tying a knot to secure the thread at the back of your project is the simplest way to start a thread.
First, thread the needle. Then, tie a knot at the opposite end of the thread.
Then start the first stitch by passing the needle from the back through to the front until you feel the gentle tug of the knot at the back of the fabric. That’s it!
Main Menu
The advantage to tying a knot is that it’s simple. And it can work with any thread, any type of embroidery technique, any fabric, and any type of thread.
The main disadvantage is that this leaves a small lump in the back of the project. And at the end of the project, you may want to take the time to trim all those little hanging tails.
Tying a knot to start a thread is recommended for new stitchers just starting out learning how to hand embroider. You can also use this method when the back doesn’t matter at all. It’s also helpful when finishing the project doesn’t press against the back.
Use a Temporary Knot
5. The Waste Knot
A variation of tying a knot to start a thread is the Waste Knot.
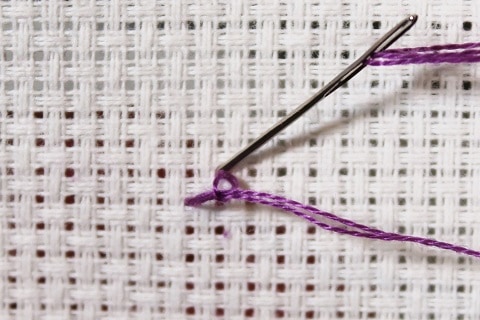
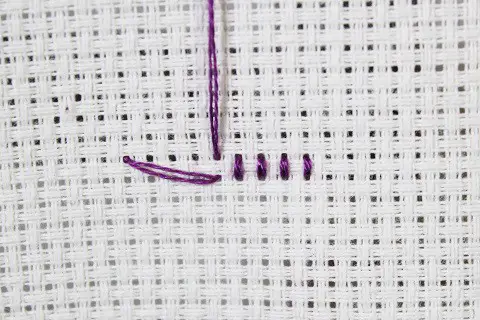
It begins the same, with threading a needle and tying a knot at the end of the threads. But instead of starting by pushing the needle from back to front, you start from front to back. Then, the first stitch is made about 4 or 5 stitches from the knot.
Stitch towards the knot. Make sure that you are stitching over the thread on the back between the knot and the first stitch.
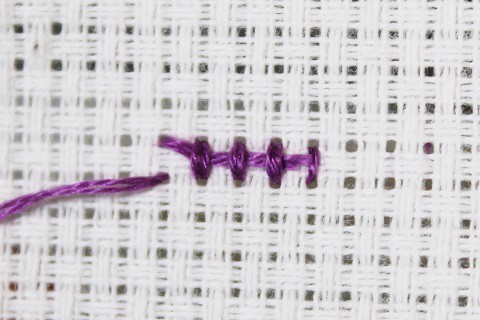
After stitching the last stitch and you arrive at the knot, cut it off. The thread is already secured under the stitches.
View of Waste Knot from the Back
This is also a good technique to use for beginners. You don’t have to worry about tension as you start because the thread is first secured by the knot. And you don’t get the lump in the back of the project because the knot is cut off. This method for securing a thread is also good for most types of stitches and fabrics.
The only real disadvantage is that it takes a bit more time to go back and cut off each knot before the ends get tangled up in future stitches. Be careful not to snip any stitches when trimming off the knot.
Use the away knot when it matters if the back of the project has little lumps.
6. The Away Knot
A variation of tying a knot to start a thread is the Away Knot. It begins the same, with threading a needle and passing the needle from the back to the front.
But instead of starting the thread near where you intend to make the first stitch, start the thread an inch or two away. The stitches should go away from the knot, and they do not cover the thread on the back.
This tail will be covered later with a different thread, or using a different stitch.
Use the Away Knot with thread that is likely to show through the fabric. The Away Knot is also useful in other types of embroidery, where the stitches are too loose to secure a thread.
Never Miss a Tutorial
Become a Notorious VIP and get new tutorials delivered straight to your inbox. Plus, get exclusive access to free patterns.
Starting a Thread Without a Knot
Bury Method
The Bury Method works like starting a thread using a temporary knot, except you skip the knot.
7. Bury in the Back
To start a thread to be buried in the back, thread a needle and pass it through from the back to the front. Make sure to leave enough loose at the end to cover with about 4 stitches. Create the first stitch, and cover the loose thread on the back.
Continue with about 4 stitches, reviewing the back with each stitch, until the thread in the back is completed, covered and secure.
It takes a little practice to leave just the right amount of thread loose to be buried. If the tail end is not fully covered, clip off any extra.
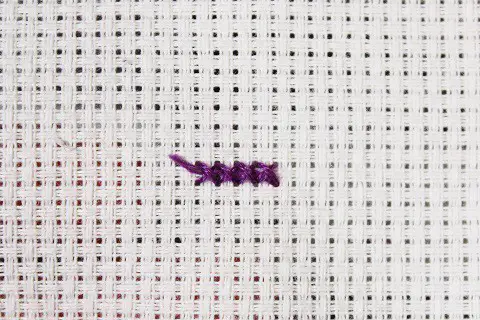
8. Bury in the Front
Bury the thread in the front the same way you would bury it in the back. The difference is that it is the front stitches that cover the thread.
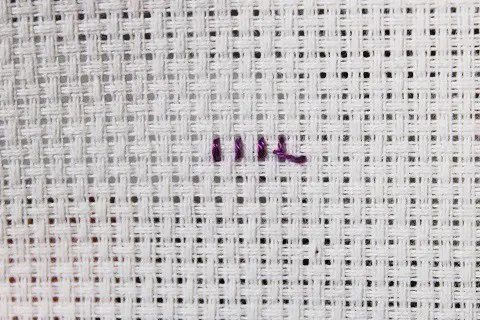
A little extra tail was purposefully left in the picture below so that you can clearly see the tail. Otherwise, it becomes completely invisible!
View of Front-Buried Tail from the Front
View of Front-Buried Tail from the Back
For the Bury Methods, it takes a little practice to leave just the right amount of thread loose. If you leave too little, the thread is not secure. Sometimes, the thread slips right through if the tension isn’t just right. If you leave too much thread, trim it carefully with a pair of embroidery scissors.
When to Use the Bury Method
Use the Bury Method in the back for the same purposes you would use the Temporary Knots. And with the Bury Methods, you don’t have to go back and cut off any knots. This also works well when stitching on a frame or a stand where access to the back of the fabric is inconvenient.
Starting a thread by burying it in the front has the added advantage of leaving both the front AND the back looking nice and neat. It works the best when each cross stitch fully covers the fabric, without any bits poking through.
You may notice that, when working with a higher number of threads, burying the thread in the front can cause those stitches to puff out a little. It’s very subtle, and most people won’t even notice.
Which Way Will You Use?
There is no right or wrong way. It’s your project and you have the freedom to stitch what and how you like. I like the loop method because it is so quick and so neat on the back. (Don’t mind me, I love a tidy backside.)
Is there another way that you prefer to start a thread for embroidery?
Check out my helpful cross stitch tutorials series, the Beginners Guide to Cross Stitch.
AMAZON AFFILIATE DISCLOSURE
NotoriousNeedle.com also a participant in the Amazon Services LLC Associates Program, an affiliate advertising program designed to provide a means for sites to earn advertising fees by advertising and linking to Amazon.com. As an Amazon Associate I earn from qualifying purchases. Visit the here or here to learn more. Thank you for the support!
You’re welcome and encouraged to link to NotoriousNeedle.com or use a single image with a brief description to link back to any post. Republishing posts in their entirety is prohibited. Feel free to pin on Pinterest!
By continuing to use this site, you give your consent to our use of cookies for analytics, personalization and ads.