Stitching the most amazing and beautiful X’s in your project is important. Both how to start a thread and how to end a thread for cross stitch are also important.
Learn how to end a thread in cross stitch embroidery by burying the thread, using an away knot, and when it’s a good idea to avoid knots.
If you haven’t already, you’ll need to know how to start a thread first. Learn how to start a thread here. Many of the methods for ending a thread are similar to starting a thread.
Watch the How to End a Thread Tutorial Video
Keep reading for more.
1. Tie Off Cross Stitch with a Knot (Sometimes)
Modern stitchers will tell you:
"Who the hell cares? It's the back. No one will see."
Modern Stitchers
And they’re right – partially. No one cares if you have a messy backside. (Ahem – only talking about embroidery!) Hang up your hoop art with all the knots you want! Do what makes YOU happy. This is YOUR art!
But sometimes you should avoid knots.
When you frame your hand embroidery, knots from the back can show up and create bumps that show through to the front. Most of the knots have tails that can peek through, too. This looks weird and is distracting.
For other types of projects when the back is visible, knots can also be a problem. They stick out and can unravel with wear with washing over time. This causes the stitching to loosen and unravel.
2. Away (Temporary) Knot
How to Tie an Away Knot
Like starting a thread, tying an away knot to end a cross stitch thread can work to temporarily hold the floss in place until making more stitches to cover it.
For ending a thread with an away knot, you need to know where you are stitching next. In counted cross stitch, count the number of stitches in the pattern next to your last cross stitch. In printed cross stitch or other forms of embroidery, find where the next section of stitches ends.
Drag the floss across the back of your project and pull the needle through to the front, from where the next set of stitches ends. This should be at least 3 cross stitches away. Then pull the thread taught so that it’s flat against the back of the fabric, and tie a knot right there in front. Finally, clip off any tail to prevent it from getting caught under future stitches.
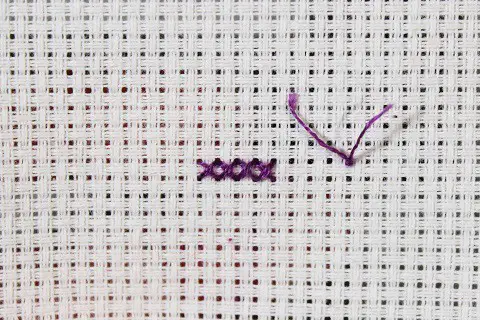
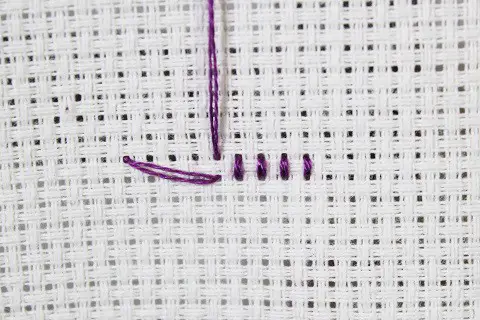
Now, while making the next set of stitches, be careful that the new stitches cover the floss that was dragged across the back of the fabric. When the new stitches have covered the floss on the back, snip the knot of the front.
That’s it! The thread is secured!
When to Use an Away Knot
The Away Knot works well with embroidery that is too loose to secure the floss under the stitches. For example, satin stitch or stem stitch (two stitches not normally used in cross stitch. (So if you’re only here to cross stitch, don’t worry about it).
It’s a good cheat, too, if the floss is too short to bury the thread (I show you how to bury the thread below).
Only use the away knot if the next set of stitches are next to the stitches just completed. The symbols should be touching in the pattern chart. Otherwise, the thread dragged across the back of the fabric may be seen from the front and distract from the beauty of the project.
Never Miss a Tutorial
Become a Notorious VIP and get tutorials delivered straight to your inbox. Plus, get access to exclusive, free patterns.
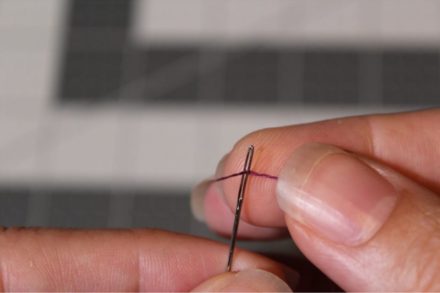
3. Bury the Thread
Burying the thread is by far the most popular way to end a thread for cross stitch or other handmade embroidery. To bury the thread under stitches on the front or the back, the method is the same.
How to Bury the Thread
After the last stitch, turn the needle horizontally and pull it through 3 to 4 completed stitches. It’s important to bury the thread under at least 3 stitches to prevent it from falling out and to prevent your stitches from unraveling. Snip the tail with a pair of embroidery scissors close enough that the tail won’t get caught up in the next stitches.
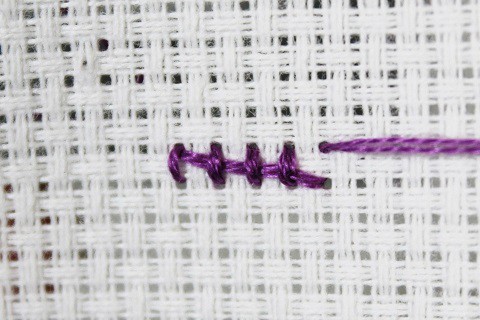
If you bury the thread in the front of your project, pull the thread nice and tight before snipping the tail. Then, when cutting the tail (be careful not to snip the stitch), the end of the thread will slide slightly behind that last cross stitch.
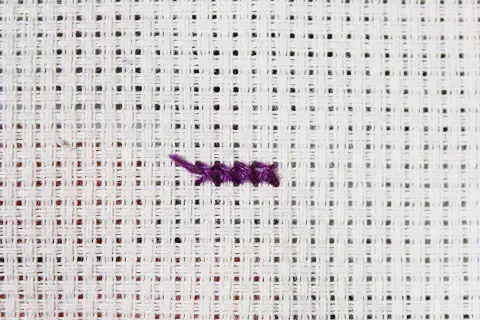
Buried thread from the front. (The tail of the thread was left intact in this pic so you can see it clearly. Make sure to snip off any extra tail of thread in the front of your project.)
When to Bury the Thread
The best time to bury the stitches in the front would be if the project will be entered into a contest and the back must be perfect. It’s also used if you are stitching using a large frame or floor stand and you can’t flip the project over to see the back.
Can’t Get the Needle Under the Stitches?
Usually, this is because the tension on the stitches is too tight. This happens when you pull the thread too hard with each stitch, and it can bunch up the fabric.
The best way to avoid this is just practice. Especially if you are working on your first project, try stitching a few rows and ending the thread a couple of times before starting the project.
It could be that you are using the wrong size needle. If the needle is too big, it will naturally be more difficult to pull it through under the stitches. I use a size 24 tapestry needle on 14 count aida cloth for nearly all my projects.
It’s Up to You
As with most things cross stitch, the method used to create a fantastic project depends on the intended use. If the cross stitch is just for you or if the back will be covered by a frame, it doesn’t matter what the back looks like.
Use whatever works for you. It’s supposed to be relaxing and FUN!
If you haven’t yet, check out these free patterns now available for Notorious VIPs. Use them to practice your stitches, then gift them.
Stitch on!
If you have completed all of the steps in the Beginners Guide to Cross Stitch. Now you know everything you need to know to stitch your first cross stitch project.
YAAASSS QUEEN! 👑
Ready to move on? Try these 5 stitches that every cross stitcher should know.
If you want to make your cross stitch a FFO (Fully Finished Object), it’s time to wash, iron and frame your project.

