
Hey, fellow stitching enthusiasts! 🧵 Ready to kick your cross-stitch game up a notch? If you’ve ever dreamed of transforming your plain old t-shirts into wearable works of art, you’re in for a treat. In this step-by-step tutorial, we’ll unravel the secrets of cross-stitching on t-shirts using waste canvas. From simple stitches to complex patterns, we’ve got you covered. We’re going to show you how to make fun, personalized tees that will have everyone asking, “Where did you get that?”
Quick Links to Topics in this Article
Video Demo of Using Waste Canvas to Cross Stitch on a T-Shirt
The Allure of Cross Stitching on T-Shirts
Crappy Waste Canvas Instructions
Pattern Selection for T-Shirts
Tools and Materials for Cross Stitching on a T-Shirt with Waste Canvas
Step-by-Step Guide to Cross Stitching on T-Shirts using Waste Canvas
Troubleshooting Removing Waste Canvas
The Allure of Cross Stitching on T-Shirts
We’ve all been there—scrolling through online shops, trying to find that perfect T-shirt that screams “you.” But what if you could create something uniquely yours? That’s where cross-stitching on t-shirts comes in, adding a touch of your personality to your wardrobe.
Bridget (my Mom) started stitching on t-shirts when she ran out of wall space for art in her home. Now, she has a growing wardrobe that is a canvas of self-expression!

Enter the feature of our cross-stitching adventure: waste canvas. Waste canvas is the secret sauce that lets us stitch intricate designs on fabric, turning your plain tee into a wearable masterpiece.
Why Waste Canvas? Waste canvas is pulled away after stitching, leaving only your brilliant design behind.
Crappy Waste Canvas Instructions
The one bad thing about waste canvas is the vague instructions.
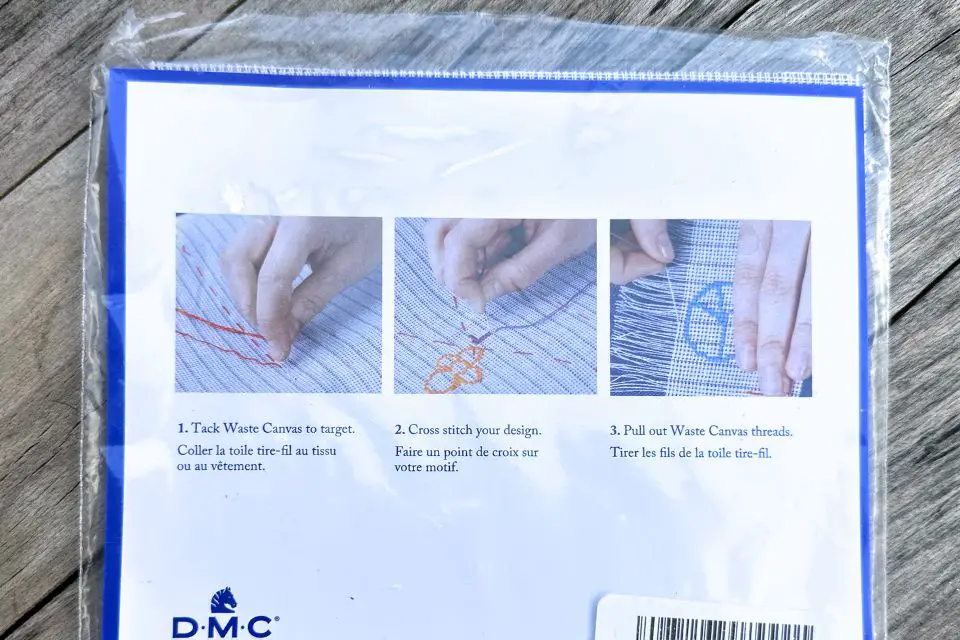
This Charles Craft waste canvas includes the following instructions:
- Tack waist fabric to target
- Cross stitch your design
- Pull waist fabric threads
That’s It! That’s as much direction as they gave.
Bridget and I have stitched many t-shirts and made MANY mistakes. And now we’re sharing with you so you can skip the mistakes and move on to stitching up whatever you want.
Watch the video below for a demonstration and read on for details.
Pattern Selection for T-Shirts
Ready to unleash your creativity? Look for smaller patterns, only one or two pages long. The smallest waste canvas I’ve found is 14ct. On average, your stitching space on a t-shirt will be 10” x 10”, which means your pattern should be no larger than 140 stitches high by 140 stitches wide.
Waste canvas is notoriously hard to work with for full-coverage patterns. Pick a pattern that has some space between the stitches.
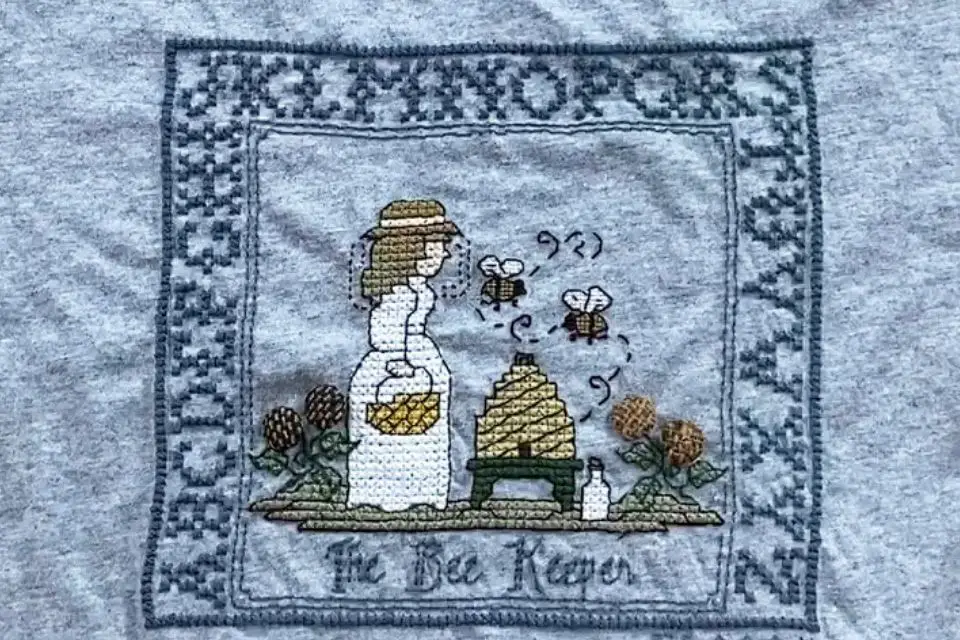
Bridget chose to do The Beekeeper by Sandra Cox, which is put out by the Bee Cottage. This pattern isn’t ideal because the stitches that make the bees are done over one and everything else is over two. But because she used 8.5 ct waste canvas, the stitches were very large and the bees turned out fantastic!
For full-coverage patterns, I recommend using water soluble canvas instead.

You need to look at the number of stitches in your pattern, do the math and discover how big it will be when finished.
You can use the Cross Stitch Calculator to help you.
Here are some trendy cross-stitch patterns tailor-made for your next T-shirt project:
A. Floral Finesse
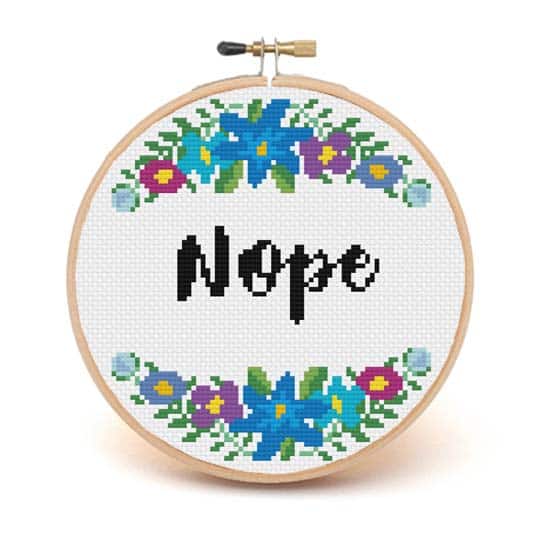
Florals are timeless and a wreath is a classic cross stitch pattern. Try a floral wreath pattern “Nope with Blue Floral Wreath” from the Notorious Needle Effin’ Flowers Collection.
B. Sassy Quotes
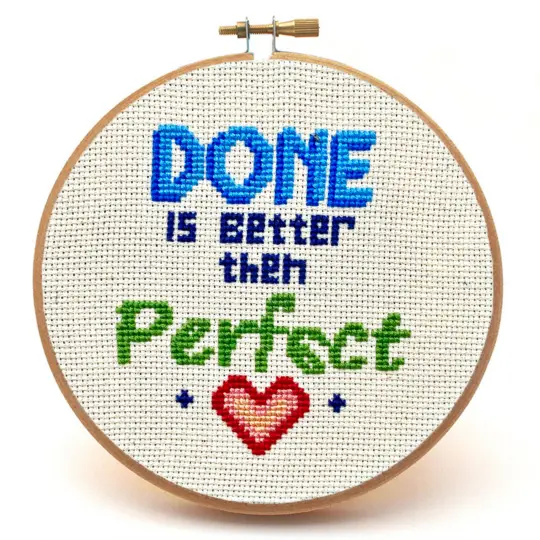
Inject some personality with witty quotes. This pattern from the Notorious Needle “Done is Better Than Perfect” from the Signature Collection serves as a silly reminder not to wait for perfection.
C. Minimalist Magic
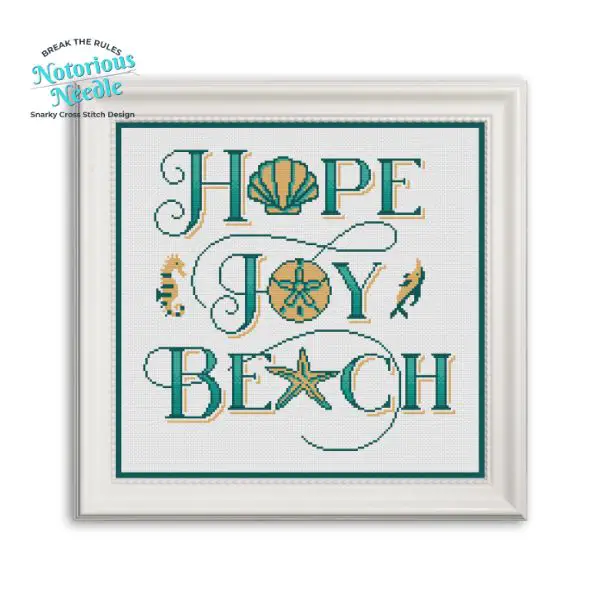
Less is more. Create striking designs with minimalistic patterns. Like this pattern “Hope Joy Beach” from the Notorious Needle Sea Sun Greetings Collection
D. Make a Statement
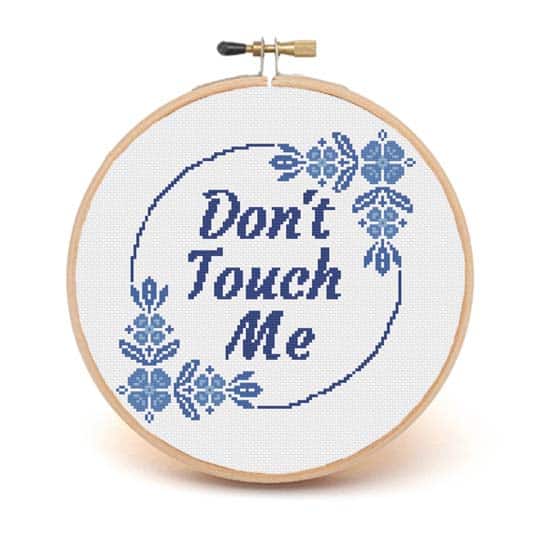
Express yourself with a statement pattern. Like this pattern from Notorious Needle “Don’t Touch Me” from the Notorious Needle Quarantine Collection
Finding the Perfect T-Shirt

Choosing the right t-shirt is crucial. Opt for a breathable fabric that matches your style. Avoid pockets! Unless your pattern uses the pocket as part of the design, stitching over a pocket is a real PITA.
I once tried stitching on a t-shirt with a pocket (I got impatient and didn’t want to wait until I could pick up a new tee to start) and had to throw it in the garbage bin. It looked awful stitched over the pocket seam.
Picking the perfect tee is an art. You want a color that complements your design and a fit that feels as good as it looks.
Fabric Matters
Consider the fabric type. Cotton is a classic choice, but experiment with blends for a different feel. My personal favorite? A cotton blend that’s as comfy as it is stylish.
Pro Tip: Cotton shrinks, which is great for long-lasting stitches! Consider going up a size.
Your t-shirt needs to be colorfast so that the color of the shirt doesn’t bleed onto your stitches when you wash it.
The Right Needle

A sharp needle is your worst enemy. If you pierce the waste canvas while stitching, it’s like pulling teeth to get it out! Save it for stitching on the pocket of your jeans.
The tapestry needles you already use for cross stitch are perfect for t-shirts.
Waste Canvas

The most important thing is to verify that the canvas is big enough to stitch your whole pattern.
I’ve only ever been able to find waste canvas in 14ct and 8.5ct (which seems an oddly specific size). The biggest sheets of waste canvas that I’ve seen are 12”x12”.
T-Shirt Form (Optional)

You just need something thin, flat and firm to stick in between the layers of your t-shirt while you’re attaching the canvas. You don’t want to stitch the front and back together. (Ask me how I know! 😝)
I used a cutting board from the Dollar General Store. It’s a thin piece of plastic that is the perfect size to fit inside the T-shirt.
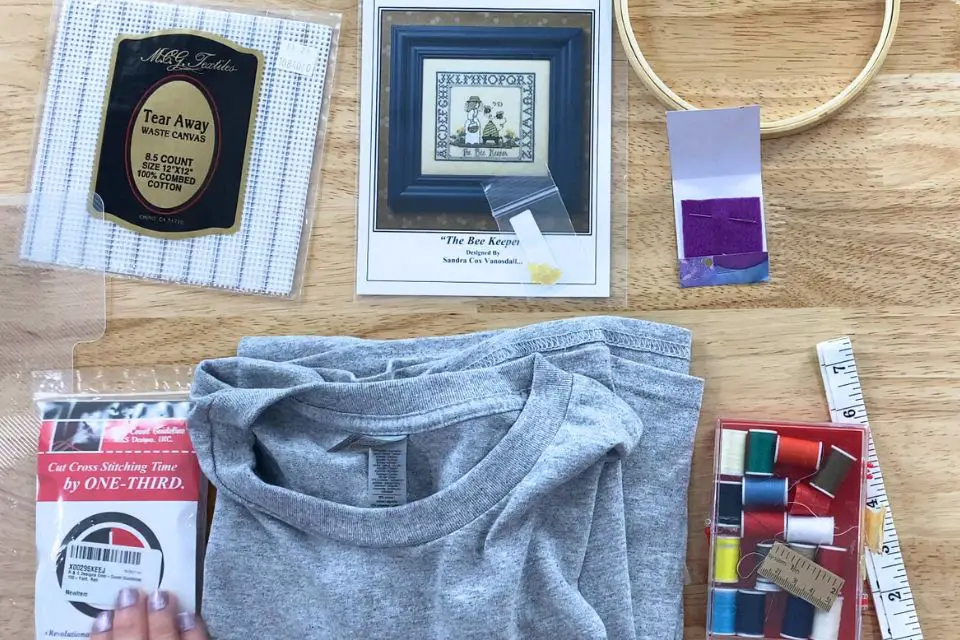
Tools and Materials for Cross Stitch on a T-Shirt With Waste Canvas
If you’re a cross stitch aficionado, you most likely have the rest of the tools and materials lying around. If not, I’ve got you covered. Here is the complete list:
VIEW MY AMAZON SHOPPING LIST OF TOOLS AND MATERIALS NEEDED TO COMPLETE THIS PROJECT
Tools & Materials
Step-by-Step Guide to Cross Stitching on T-Shirts Using Waste Canvas
Time to turn that plain T-shirt into a work of art.
Step 1: Wash Your T-Shirt (Optional)
In this tutorial, we’re specifically talking about stitching cotton threads on something that’s 100% cotton. You may want to do something different for different materials.
You should wash your t-shirt if you have sensitive skin. You’re going to be holding this in your hands and on your lap for several hours.
Wash your t-shirt if you’re not sure it’s colorfast. I use these color guard sheets to catch any dye so that it doesn’t stay in my washing machine.

Bridget likes to wait until after she’s done stitching to wash her t-shirts. That way, she can take advantage of the way cotton shrinks when washed in hot water later to grab and hold on to your stitches.
Step 2: Attach Stabilizer (optional)

Using a stabilizer is purely optional. You might want to use it because t-shirt fabric is stretchy and waste canvas is not. The stabilizer holds the t-shirt material and keeps it from stretching while you stitch. This keeps the tension even and is what helps your stitches look uniform.
It’s optional because the slipping and stretching are completely avoidable if you just use an embroidery hoop. I’m guessing you already have one of those lying around.
I “stitch in hand” and I even have a collection of embroidery hoops!
Learn more about embroidery hoops here: https://www.notoriousneedle.com/embroidery-hoop-guide
The stabilizer should be used on the inside of the t-shirt, which is the “back” of our stitching.
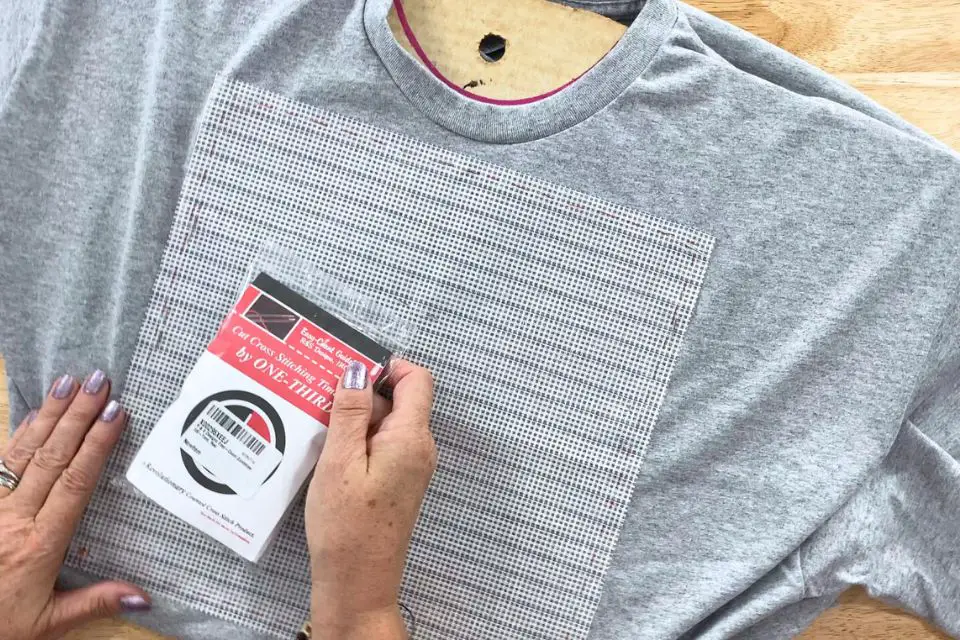
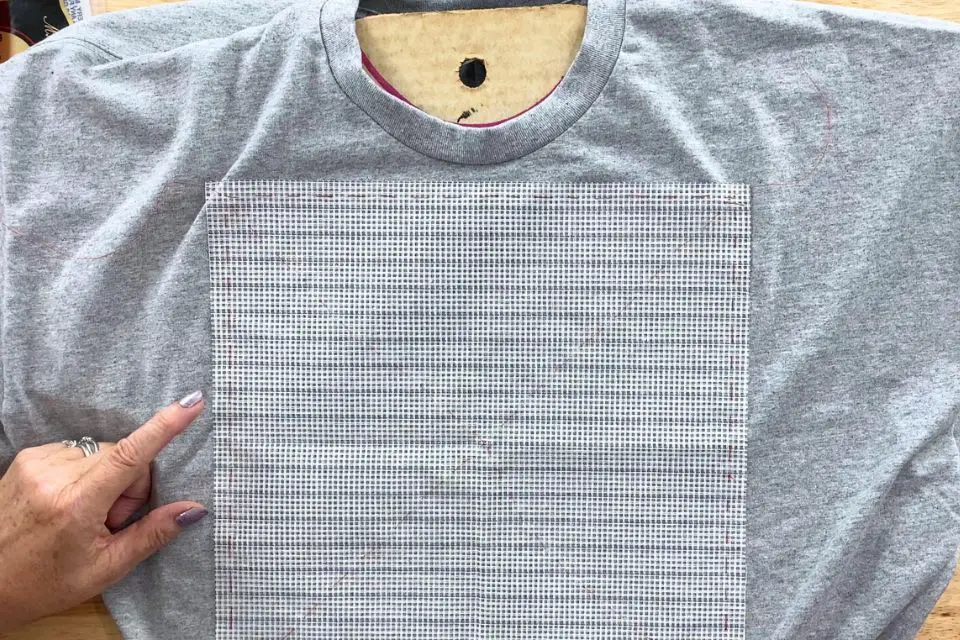
Step 3: Measure Where to Place the Waste Canvas
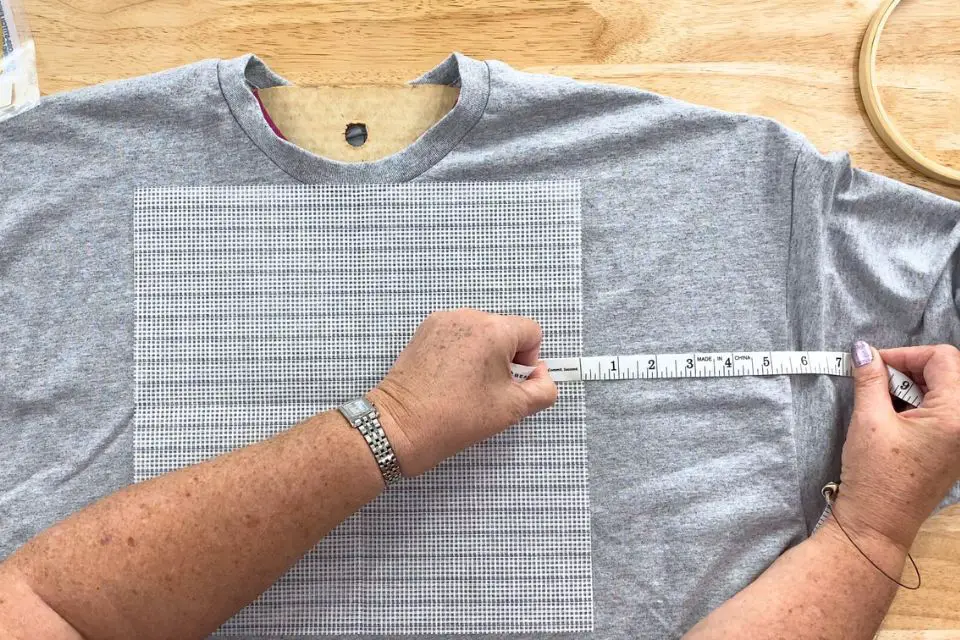
If your design is a lot smaller than your piece of waste canvas, cut your waste canvas to be about an inch or two larger than your design size on all sides. Measure twice!
Bridget and I made this waaaay too complicated in the video. lol If you’re stitching up a t-shirt for you, you have your own model!
Enjoying This Tutorial?
Become a VIP and get instant access to free patterns, plus future tutorials and stitchy inspiration delivered to your inbox.
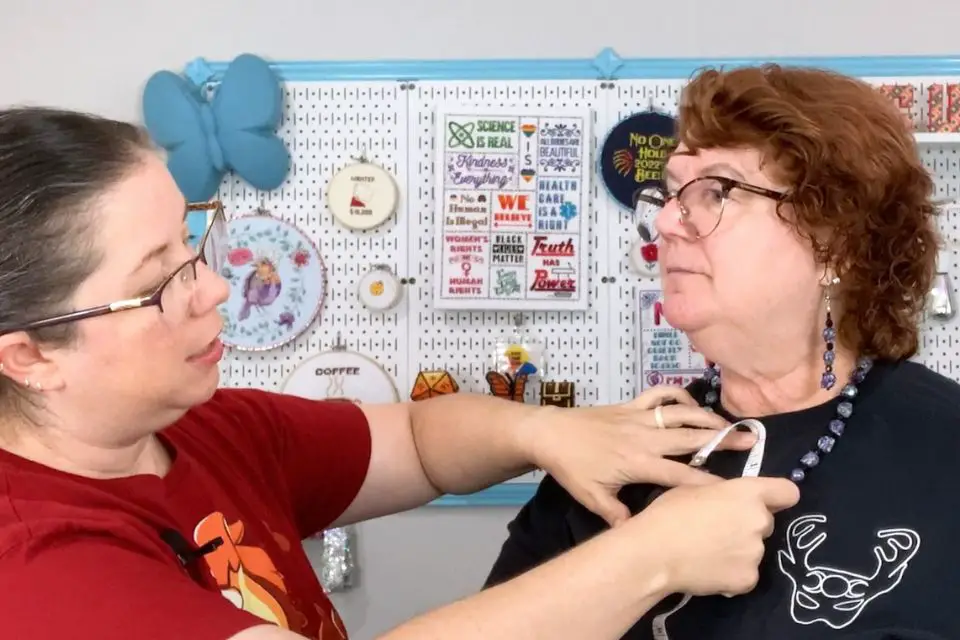
Use Your Body to Model Your T-Shirt
Put your t-shirt on and eyeball where you want the center of your pattern to be and mark it with a pin.
Remove your t-shirt (watch out for the pin!) and lay it down flat. Here’s where that cutting board comes in! Place that (or anything thin, flat and firm) inside the t-shirt under where you’re going to attach the waste canvas. Smooth out the shirt.
Find the center of your waste canvas and line it up with your pin. Is it straight? Great!
You’re ready to pin that sucker down.
Stitching a gift?
Let’s say you’re stitching a t-shirt for a loved one and you don’t want to spoil the surprise.
Place the t-shirt mold (or dollar store cutting board) inside the t-shirt. Lay the shirt down flat and smooth it out.
Imagine where you want the center of the pattern to be. How far up does it go from the center? Take the height measurement of your pattern that you got from the Cross Stitch Calculator and divide by 2. That is how far up from the center your pattern will be stitched. The top of your pattern should be at least 2 inches down from the collar.
Find the center of your waste canvas and line it up with where you want the center of your pattern to be.
Now, let’s pin it in place.
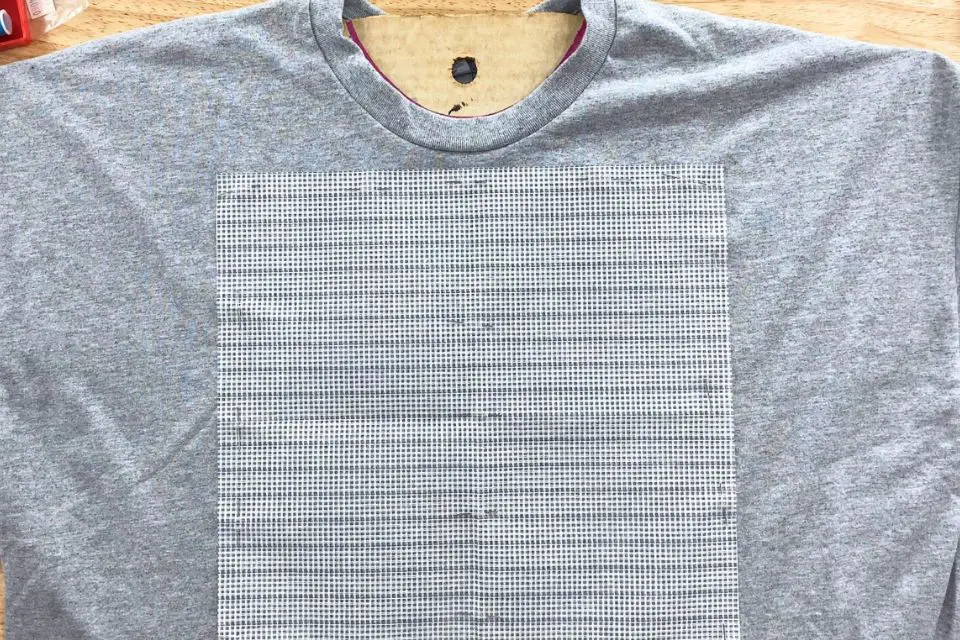
Pin on the Waste Canvas
I recommend using these pins with the big balls on the end because they’re easy to see and easy to remove.

Pin the waste canvas onto your T-shirt. Be generous with those pins—you don’t want any surprise shifts mid-basting.
Place the first pin in the center. Check and make sure that the canvas is straight and exactly where you want it.
Go up about 2 inches and add another pin. Do this top to bottom and left to right from the center.
Keep the shirt flat and smooth as you pin it. Is the canvas still straight?
Next, pin all around the edges of the canvas. Did I mention using LOTS of pins?
If you run out of pins, you can always use needles. I don’t know any cross-stitchers that don’t have a bunch of extra needles.
Double-check that the waste canvas is still straight and exactly where you want it. Now double-check that you didn’t pin the front and the back of the t-shirt together. Trust me. Measure twice, stitch once!
Step 4: Baste On the Waste Canvas
Use the Easy Glide Gridding Wire to baste on the waste canvas. You could use something like fishing wire, too. Use a high contrast color that’s easy to see and remove later. You don’t want to use the dressmaker pins to hold it in place while you stitch because you’ll be stabbing yourself every 2 seconds.

Do NOT use regular thread or floss for basting anywhere near where you’re going to stitch. The basting stitches are temporary and you’re going to be stitching over them. You don’t want to accidentally pierce the basting thread when you cross stitch because you’ll never get it out!
Pro Tip: No need to knot the gridding wire at the start. Leave the tail end loosy-goosy and we’ll tie it up at the end. A knot will make it harder to pull out the temporary basting stitches.
What is a basting stitch? A basting stitch is a large, temporary stitch that is easily removable. It’s a sewing stitch that is also called tacking.
Keep the t-shirt mold inside the shirt while you baste, and make the t-shirt as flat and smooth as possible. You don’t want any puckering because that will look really weird while wearing it.
Baste Around the Edge First
Start basting all around the edges first. It’s safer! Leave the tail end long and loose on the outside of the t-shirt at the start. We’ll use this tail to tie off the end of the basting thread. Avoid tying off the basting thread on the canvas because that will make it harder to pull it out later.
Keep your basting stitches just 3 or 4 fabric squares inside from the edge of the waste canvas. This helps the canvas stay flat while you cross stitch and your floss won’t get caught as much on the edges.
Don’t worry if these stitches aren’t straight, they’re only temporary. The basting stitches are only to prevent the waste canvas from moving while you cross stitch.
When you’ve basted the entire edge and you come back around to where you started, tie off the end of the basting thread to the tail from the start.
Step back and look at your shirt. Is the canvas where you want it? Did it shift at all? If so, you can remove the basting stitches and try again.
Baste Diagonally Across The Waste Canvas
Next, use the gridding wire to baste the waste canvas from corner to corner, diagonally in a criss-cross. You can knot the end of the gridding wire to prevent it from falling out, but remember not to tie it to the waste canvas.
Pro Tip: Try to make your basting stitches cross in the center and this will help you place the first stitch.
This is all that’s necessary to keep the waste canvas in place, but you can always add more basting stitches if you want.
After finishing all the basting, take all the pins out. Feel around and make sure you didn’t miss any. Don’t want to prick yourself later!
Step 5: Insert the Hoop
I do recommend using a hoop rather than stitching in hand because even though the waist canvas doesn’t stretch, the shirt does. The hoop will keep your tension nice and even.
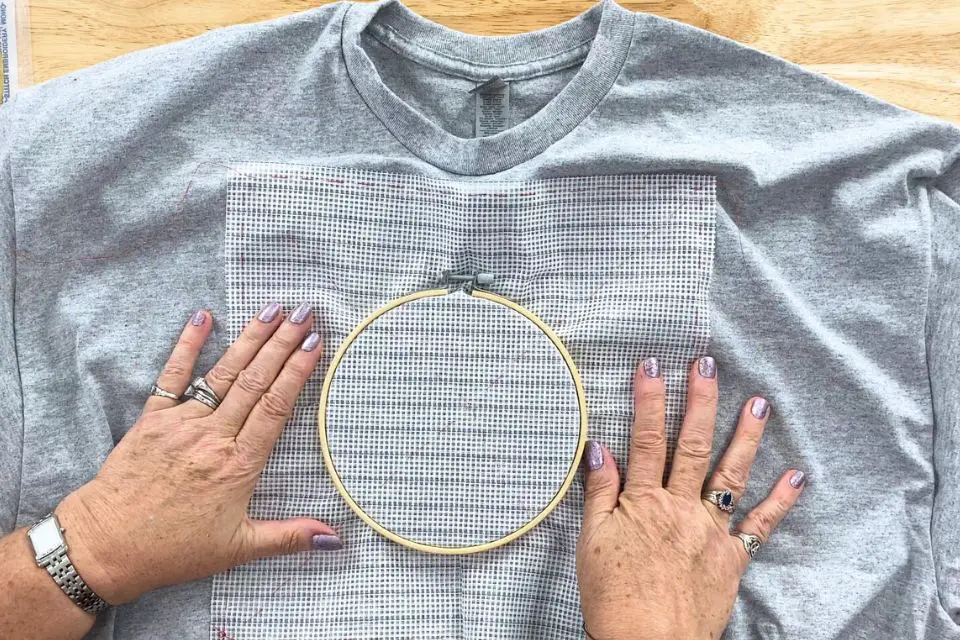
Separate the inner and outer parts of the embroidery hoop.
Open the bottom of the t-shirt and place the inner hoop inside the t-shirt. Move it so that it is under the center of the waste canvas.
Press the outer hoop down over the t-shirt and the inner hoop. Then, tighten the hoop (depending on the type of hoop you’re using).
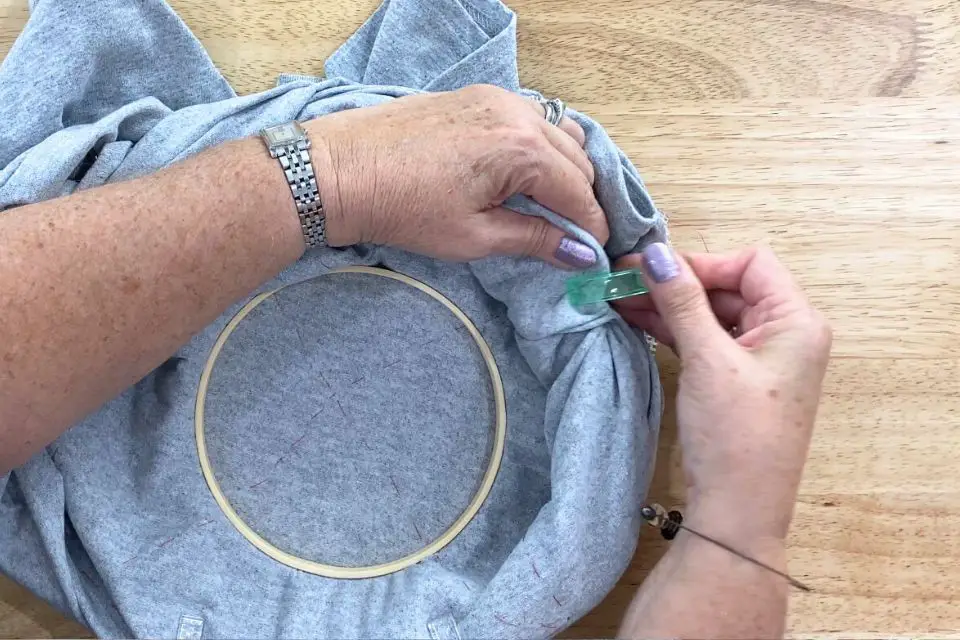
Step 6: Stitching Mojo
Time to work your cross-stitch wizardry!
Pro-Tip: Make sure your embroidery floss is colorfast. I don’t know anyone who dry cleans a t-shirt, and you don’t want the colors leaking all over your shirt.
Roll up and gather the extra t-shirt fabric and use the Wonder Clips to clip it to keep it out of the way while you stitch. Otherwise, you’ll end up stitching the t-shirt closed. Guess how I know.

I recommend you start cross-stitching in the center-center of your pattern. You could also start in the top center. Avoid starting in a corner. I once started my pattern from a corner and the whole thing was skewed to the left! No one is wearing THAT t-shirt.
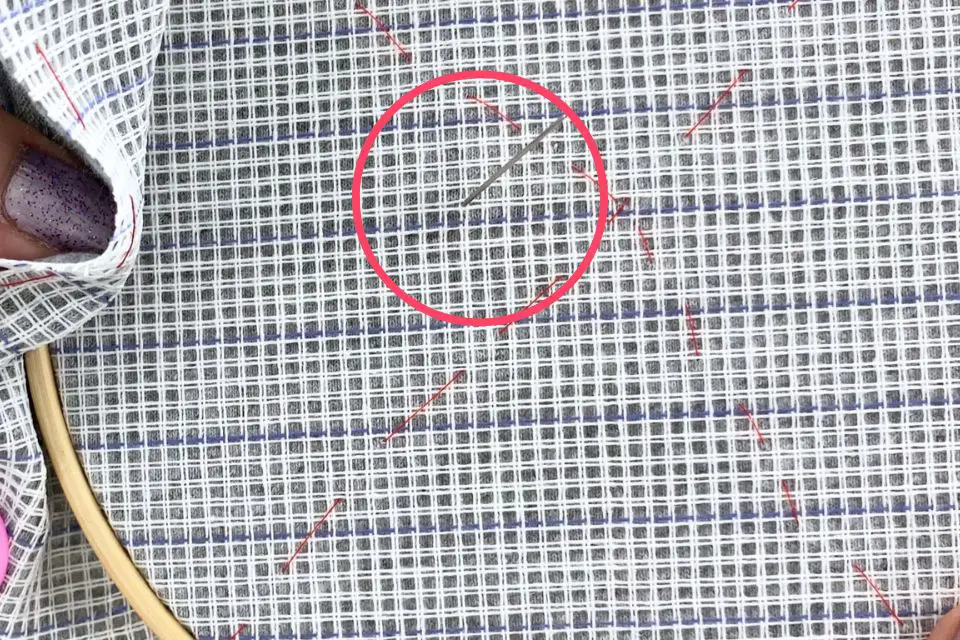
As you cross stitch, use a tapestry needle with a blunt tip to avoid piercing the basting threads. Have I mentioned yet that if you stitch through the basting threads, they’re a pain to remove? Maybe once or twice.
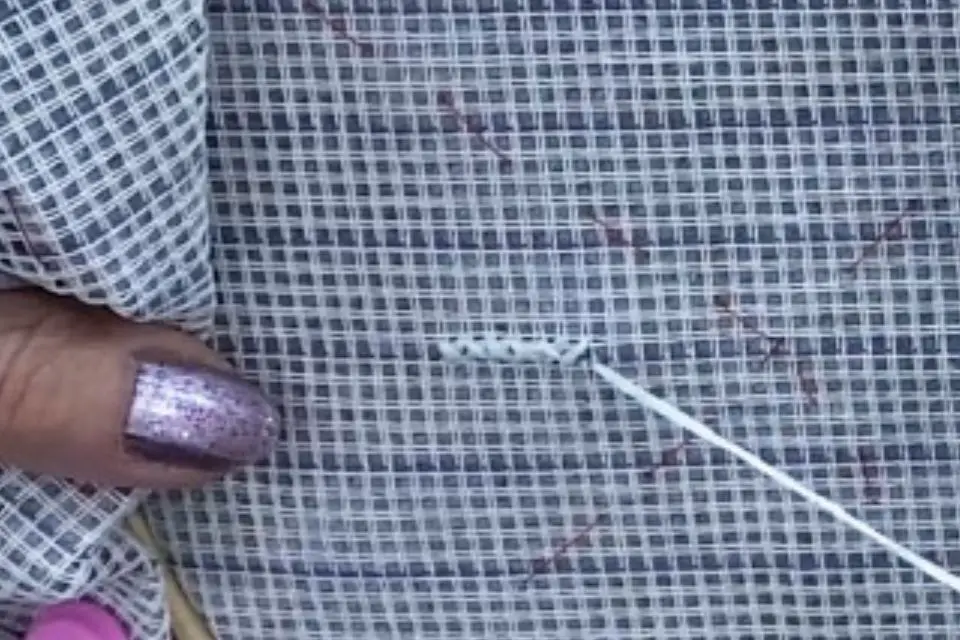
The waste canvas has an uneven hashtag sort of pattern in the way that the horizontal and vertical fibers cross each other. Move your tapestry needle through the smallest holes. This will keep all your cross stitches the same size and line them up evenly with each other.
Avoid knots when stitching wearable art. The knots would feel uncomfortable against your skin when you or your loved one wears this t-shirt. Instead, use the loop start to secure the start of your embroidery thread, and bury the tail under at least 4 stitches to secure the end.

Here’s how to use the loop start: https://www.notoriousneedle.com/eight-ways-start-thread
And here’s how to bury your thread under your stitches: https://www.notoriousneedle.com/how-to-end-thread
Follow your pattern, moving the hoop around as necessary and ensuring each stitch is snug but not too tight. Bridget pulled a little too tight in one of the first stitches and the waste canvas moved slightly. Tight stitches will make it harder to remove the waste canvas.
Count twice and stitch once! Frogging your stitches might leave small holes in your t-shirt, especially if you’re using a lot of strands of embroidery floss as Bridget did. She used 6 strands on the 8.5ct waste canvas.
If you do end up having to remove stitches, wash your finished cotton t-shirt in hot water to reduce the look of any frogging holes. For shirts that are not cotton, check the care instructions for washing the shirt.
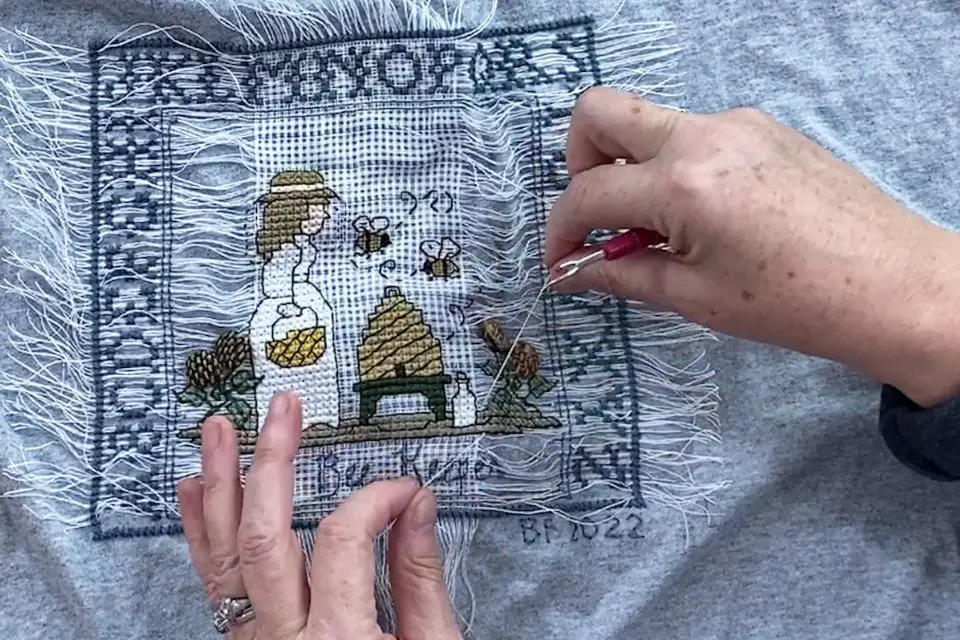
Step 7: Remove the Basting
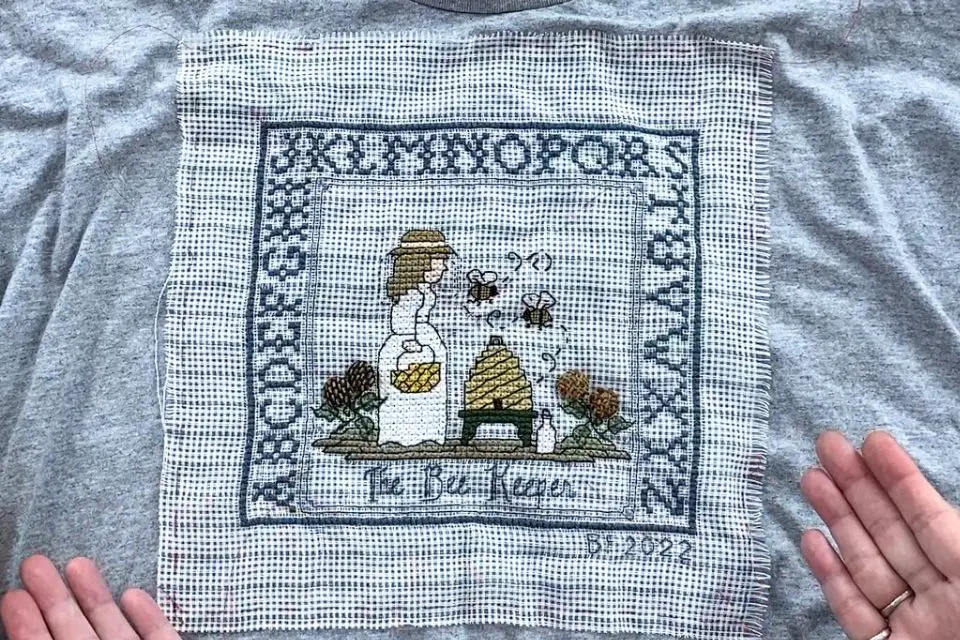
Bridget has stitched this entire project on this t-shirt and it looks fabulous! Tada!
Now, this is the easiest part!
Trim any knots you made in the basted gridding wire. Gently pull it out. That’s it! The Easy Glide will slip right out.
Pro-Tip: Easy Glide Gridding Wire is reusable!
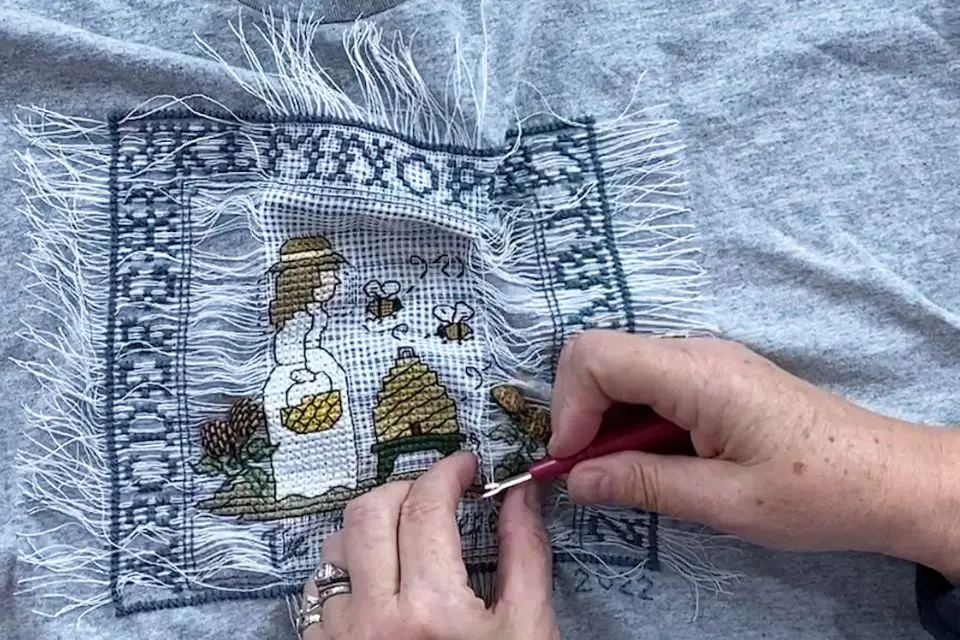
Step 8: Remove the Waste Canvas
Remove the embroidery hoop.
The directions on the waste canvas packaging may tell you to get it wet, but wait on that. Wetting the waste canvas softens the glue that holds the fibers together. But that also makes the glue a bit sticky.
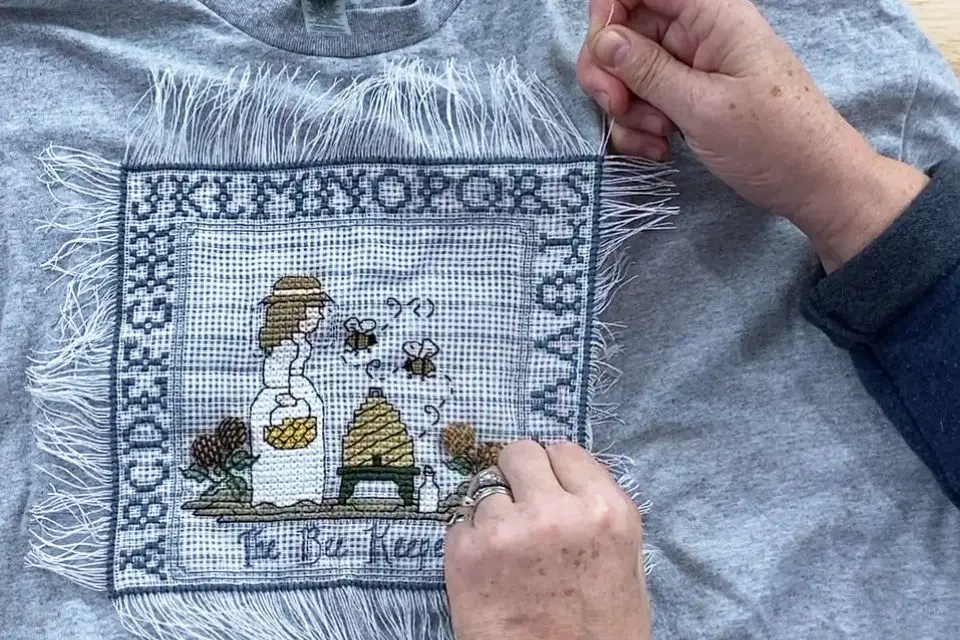
Start removing the waste canvas fibers from the outside edge first. Just pull them apart, one fiber at a time.
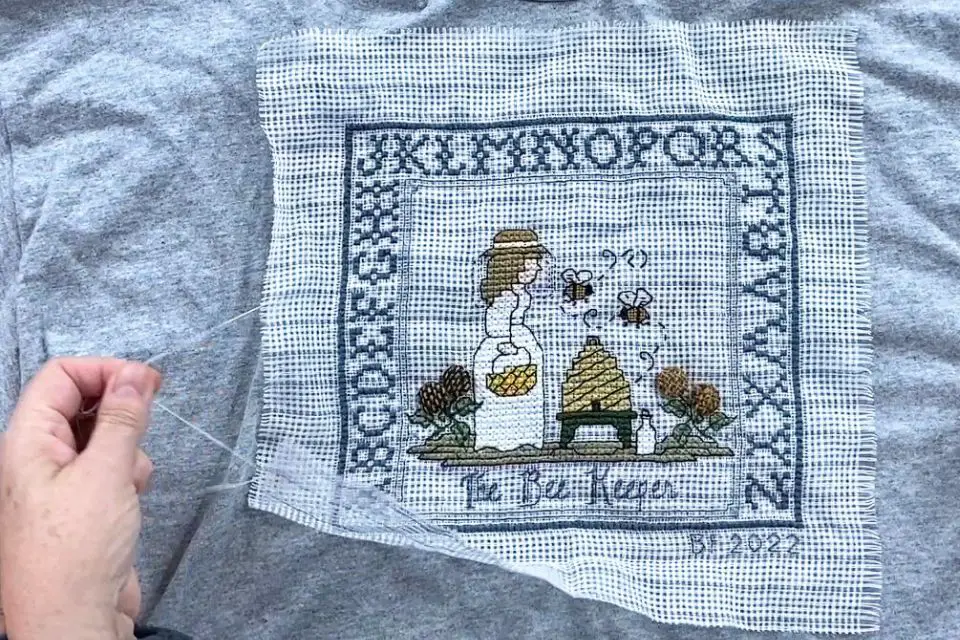
Gently tug on the waste canvas fibers that are under your stitches. Slowly slide them out all the way, one at a time. They should slip out easily.
The more threads you pull out, the easier it gets. Continue until all of the fibers have been pulled free.
Troubleshooting Removing Waste Canvas
Having trouble removing the waste canvas fibers? We’ve got solutions.
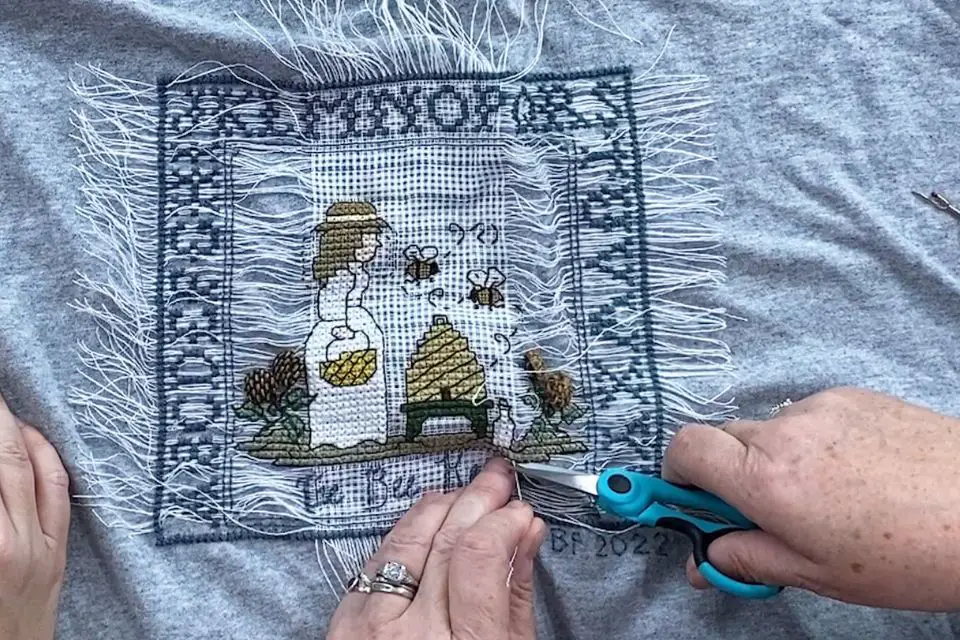
Waste Canvas Fibers Are Too Short to Pull
You trimmed your waste canvas very close to your stitches, and you can’t get a grip on the slippery things.
Try to prevent this by leaving an inch of waste canvas around your stitching.
But if it’s too late, use tweezers. Tweezers will grip the ends of the fibers and give you leverage to gently pull them out.

Waste Canvas Fibers Under a LOT of Stitches
Don’t pull hard. Waste canvas fibers that are under many stitches may be difficult to pull. Yanking them out will tug on your stitches and distort them.
Try pulling the fiber out from under some of the stitches along that row or column, instead of all of them at once. Find a blank part of the pattern. This might be inside of a border or between motifs.
Use a needle or a seam ripper (https://amzn.to/3UoArLY) to gently tug at just the part of the waste canvas fiber in the empty part of the pattern. Pull the fiber out from under the border or one motif.
Once part of the waste canvas fiber has been freed from some of the stitches, it will be easier to pull it out from under the rest of the stitches.
Removing Waste Canvas From a Full Coverage Cross Stitch Pattern
For full coverage patterns, gently tug at the end of the waste canvas fiber while inching the pattern over the fiber until it pulls free.
Have you ever had to restring a hoodie? You put the tip of the string through the hole at one end, and you have to inch the string along the hoodie, bunching it up, then straightening it out again, until the tip of the string is all the way through to the other end. Inching the waste canvas fibers free is like restringing a hoodie.
What if the Waste Canvas Fibers Break?
Now you know how hard NOT to pull. 🙂
Try to pull out the waste canvas fiber from the other side. Tug gently. Use the “inching” method mentioned above for full coverage cross stitch patterns.
If both ends break off, find the new end and tug on that.
If the remaining bit of waste canvas fiber is hidden under your stitches, just leave it. It doesn’t show and it won’t hurt anything. You may find that the fiber works its way out again after a few washings. You can pull it out then.
Waste Canvas Fibers Are Stuck
Stuck waste canvas fibers are preventable in 2 ways:
- Using a good tension so that your stitches are not too tight, and
- Avoid piercing the waste canvas fiber while you’re cross-stitching.
If you’re reading this, it’s probably too late to prevent the dreaded stuck waste canvas. Ugh! All hope is not lost.
Test to see if the waste canvas fiber is really stuck. It could be just a little difficult to pull. Tug slowly, adding more firmness as you pull. It may slip out really slowly under tight or small stitches.
Pull it from the other side. It could be resisting due to friction from the direction of the fiber rubbing against your stitches. Grabbing the opposite end might be easier.
If none of the above methods work, the waste canvas is really stuck. The first thing you need to do is identify which stitches it’s stuck under. Pull the fiber at each end and see if you can find exactly where it’s stuck.
Use a seam ripper and gently work it under a waste canvas fiber that you can see peeking out between your stitches. One side will come out from under the stitches while the stuck end won’t move.
Next, look for another place where you can see the waste canvas fiber between your stitches, and try to work out a section with the seam ripper.
Repeat until you can narrow down the exact stitch or stitches where the waste canvas was pierced with your needle and split. Remove the waste canvas from under the other stitches.
Grab both ends of the stuck fiber, one in each hand, and gently pull back and forth several times. This makes the hole where you pierced the waste canvas fiber a little bit bigger.
Using a sharp pair of embroidery scissors, cut the fiber very, very close to the stitch where it’s stuck. Avoid snipping your stitch, you want to keep that! You might want to use magnifying glasses. Cut the fiber close enough so that your cut includes the hole you expanded, then remove that part of the fiber.
When you tug on the other end of the waste canvas fiber, it will come free.
If at this point, you’re still having trouble removing the waste canvas, get it wet. Soak your t-shirt for 5-10 minutes in water, and try again to remove the waste canvas fibers.
Can’t Remove All of the Waste Canvas
Sometimes, you can’t find where the waste canvas fibers are stuck or you just can’t get them all out. It’s ok to leave them under your stitches.
Remove any visible waste canvas as best you can, and leave the rest. It won’t hurt your shirt. And if you can’t see it, no one else will. Eventually, the fibers may work themselves out in the wash, and you can remove them then with a pair of tweezers.
Finishing Touches and Care Tips
You’ve conquered the stitching and removing the waste canvas, but the journey isn’t over. Let’s put the final polish on your masterpiece.
Beads and Buttons
After the removal of the waste canvas is a great time to add beads and buttons. You already have your pattern stitched up, so you don’t need the grid anymore. The stitches to hold beads and buttons tend to be tighter than cross-stitches, which would make the waste canvas harder to remove.
Fusible Interfacing (Optional)
Fusible interfacing is a great addition if the back of your embroidery has knots or lumps, or if you used specialty threads. Metallic floss can feel itchy against the skin while wearing the t-shirt. The fusible interfacing will smooth out knots and cover any scratchy threads.
Wash and Flaunt
Wash your tee on Delicates Mode or by hand to preserve the design. Follow the care instructions on the tag. Treat it with care and it will last for years to come.
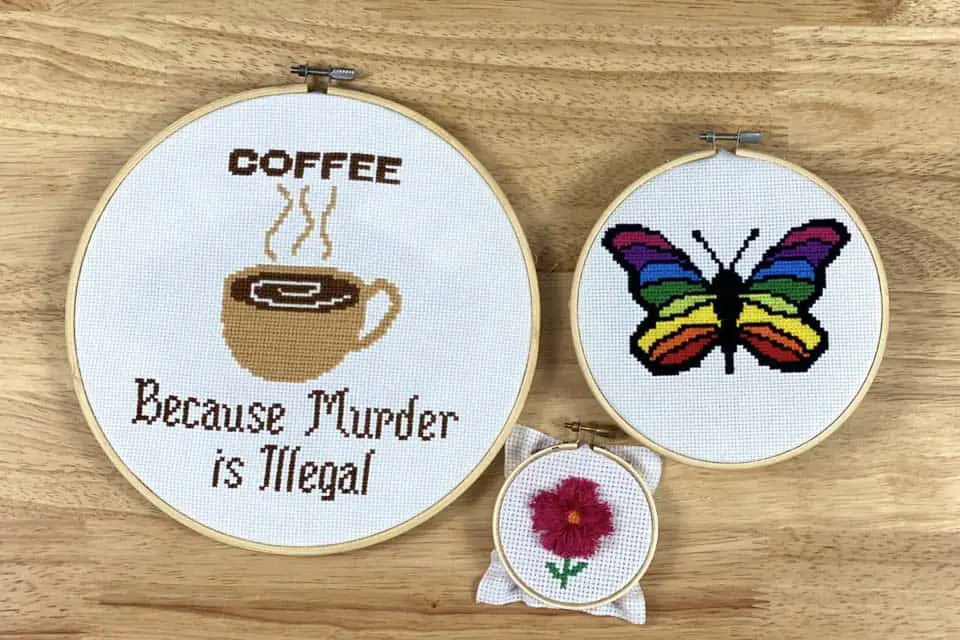
Inspiring Examples of Cross Stitch on T-Shirts
Check out these real-life examples for a dose of inspiration:
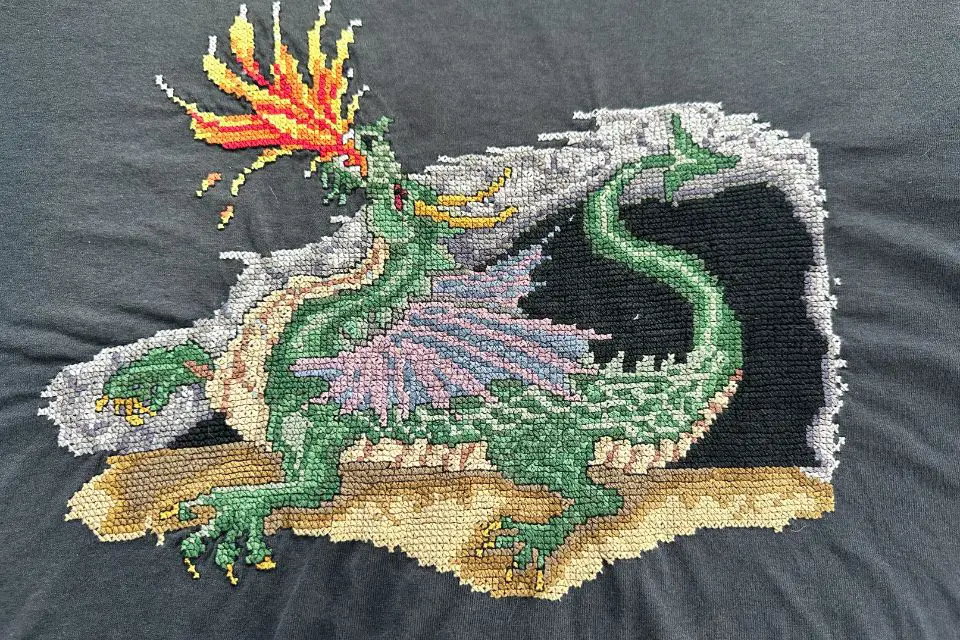
This gorgeous Dragon T has lasted decades! Sadly, the pattern is out of print.
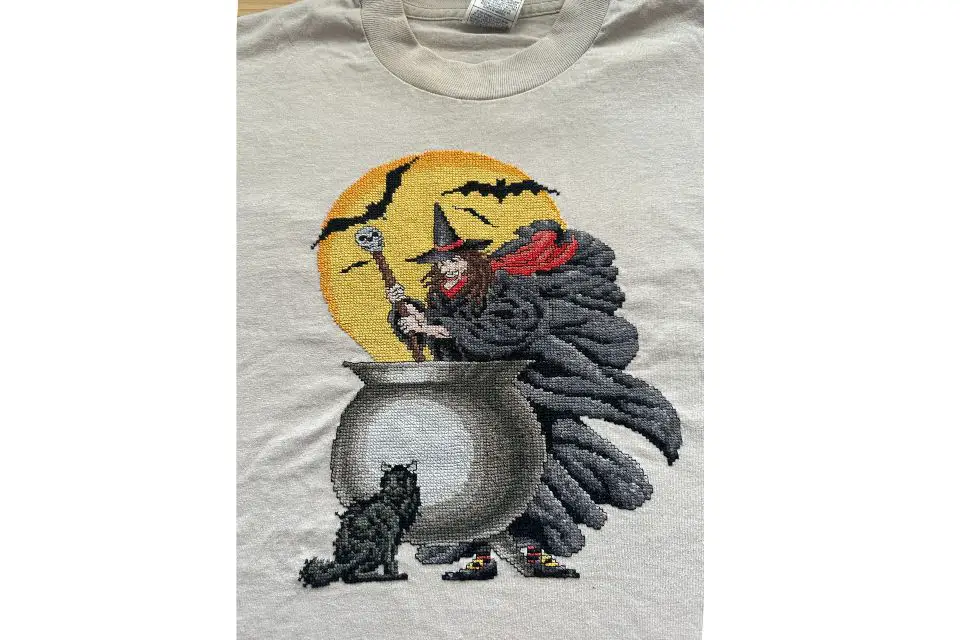
This creepy witch stirring her cauldron is perfect to wear for Halloween! The black cat familiar agrees.
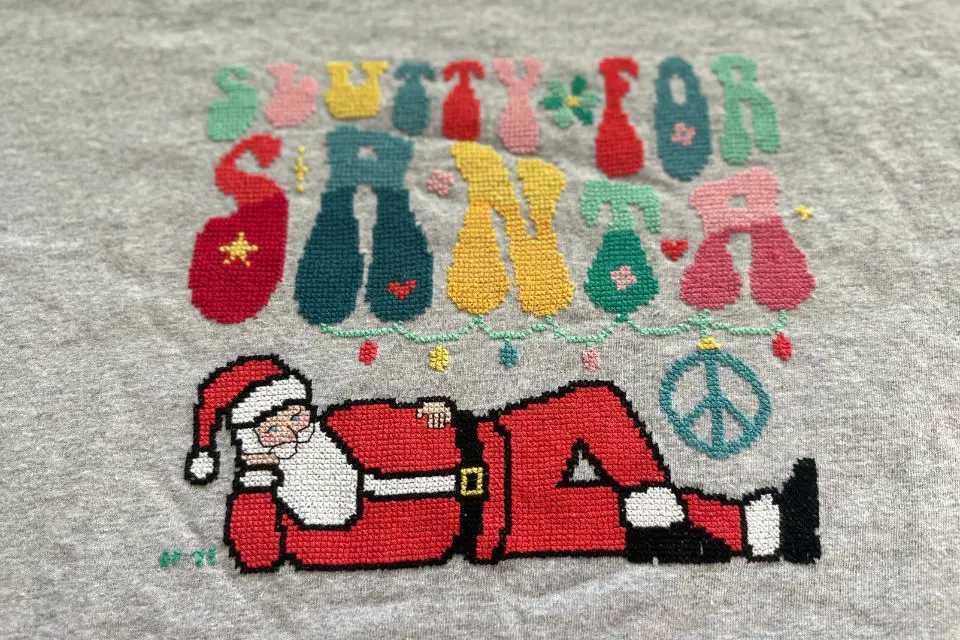
Santa makes an appearance on this joyful holiday t-shirt. You can get this Notorious Needle pattern here:
https://notoriousneedle.gumroad.com/l/slutty-for-santa
Your Tee, Your Style
Cross-stitching on T-shirts is an innovative way to personalize your wardrobe. Waste canvas opens up a realm of possibilities, and with a dash of creativity, you can customize any tee.
So, grab your hoops, thread, and waste canvas, and let the stitching adventure begin!
Stitch on!


